Sheet and title block
Assembling the sheet — format, scale, margin, border and title block — and sending it to paper or to PDF.
Step by step
1. Open the panel from the Document menu, or search for the sheet with Ctrl+K.
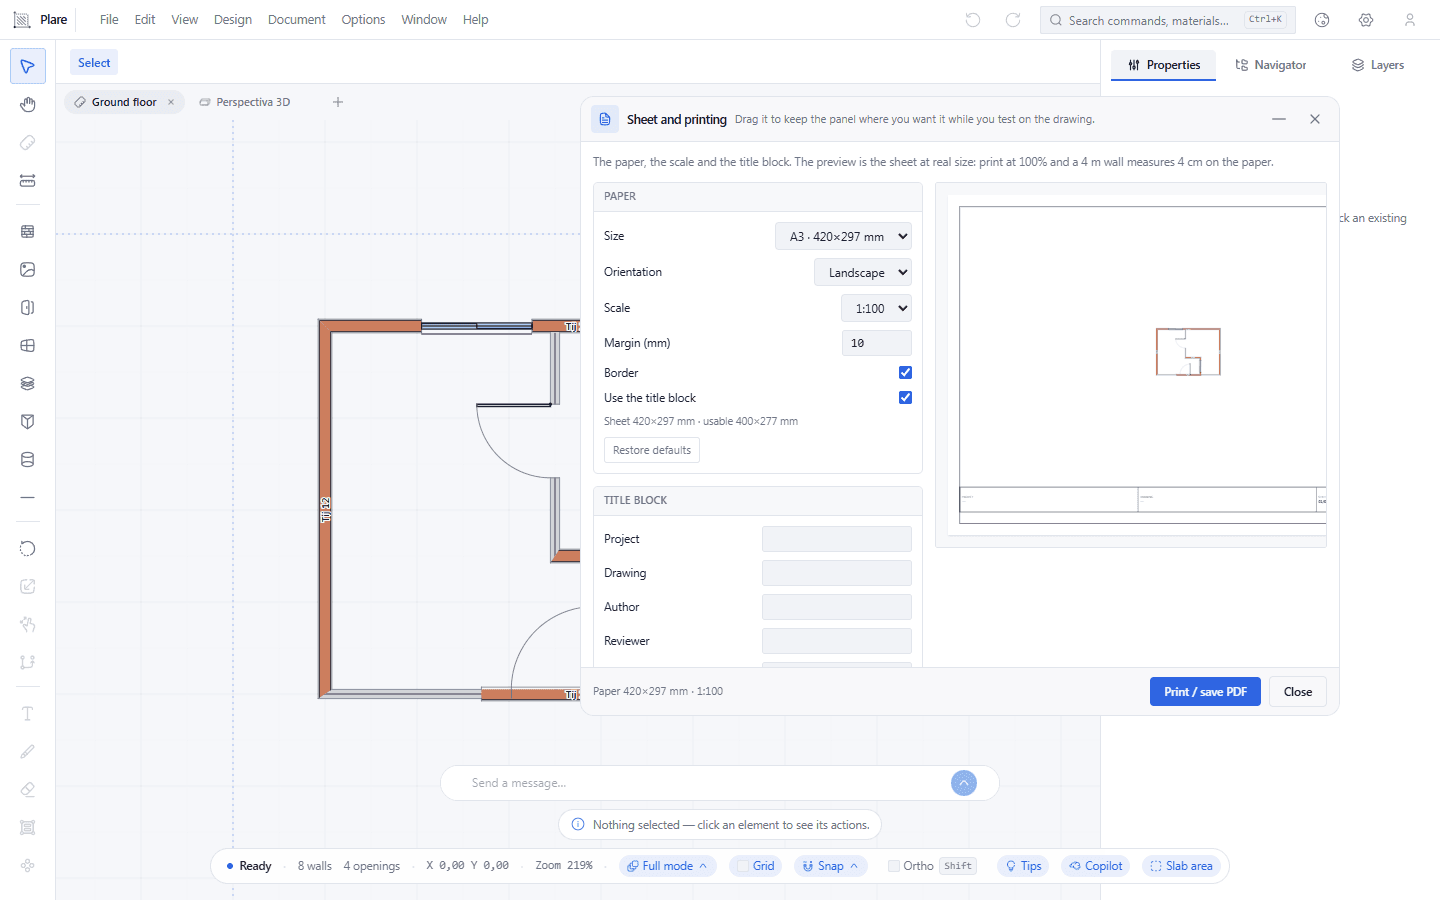
The sheet window open, with the paper group on the left — Size A3 · 420×297 mm, Orientation Landscape, Scale 1:100, Margin, Border and the title block switch — and the preview of the sheet on the right. The title block is on from the start, so its band is already at the foot of the sheet.
2. Choose the paper size: A1, A2, A3 or A4, in landscape or portrait.
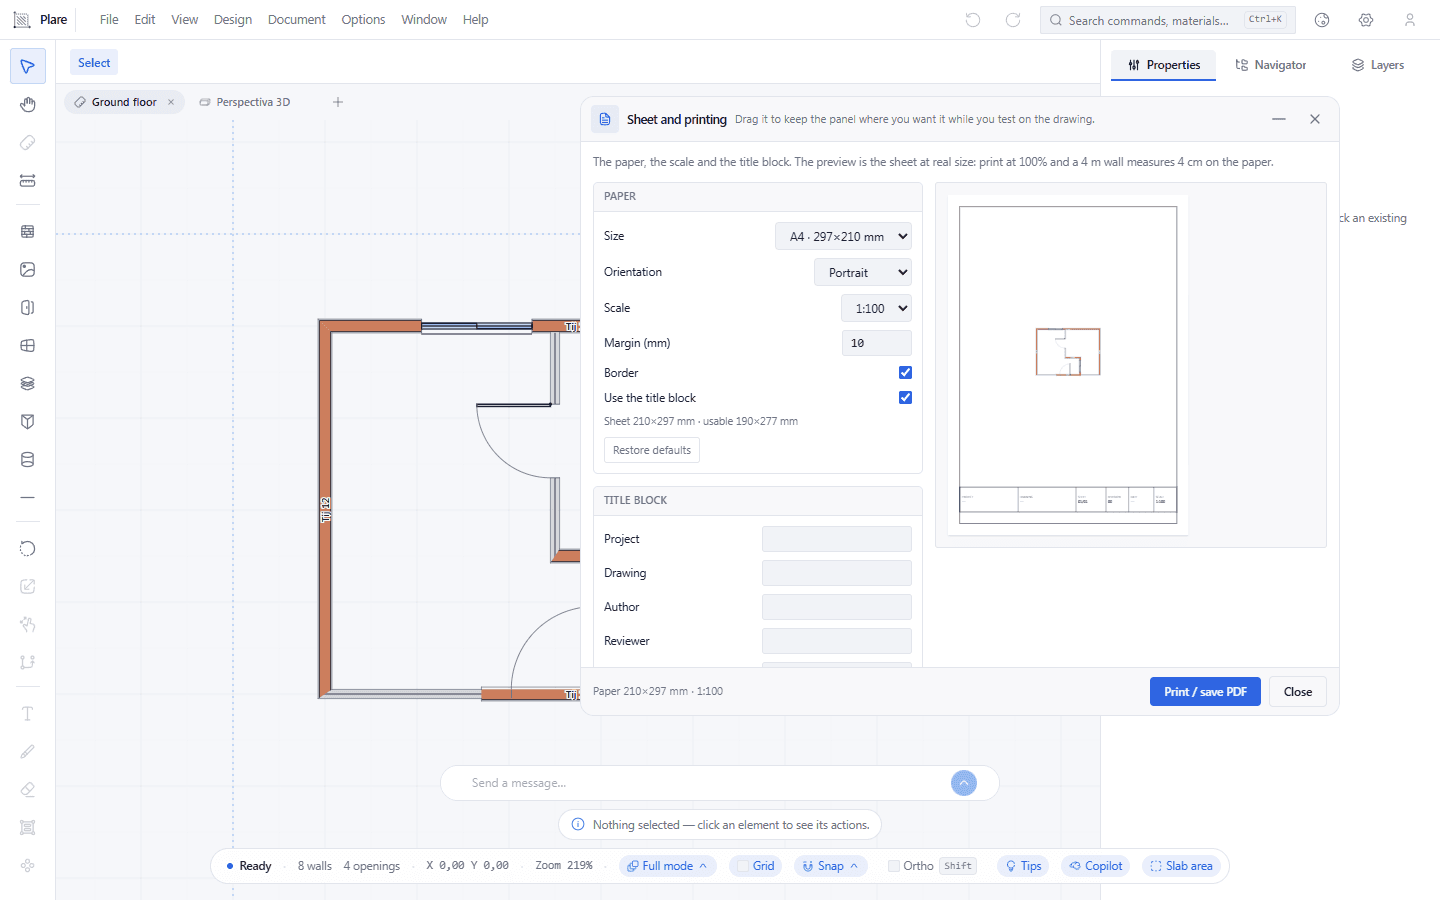
The same window with the paper switched to A4 portrait: the preview becomes an upright page, and the note under it gives the sheet as 210×297 mm with 190×277 mm left inside the border. It is that inner area the drawing has to fit, not the whole sheet.
3. Fill in the title block's fields: project, drawing, author.
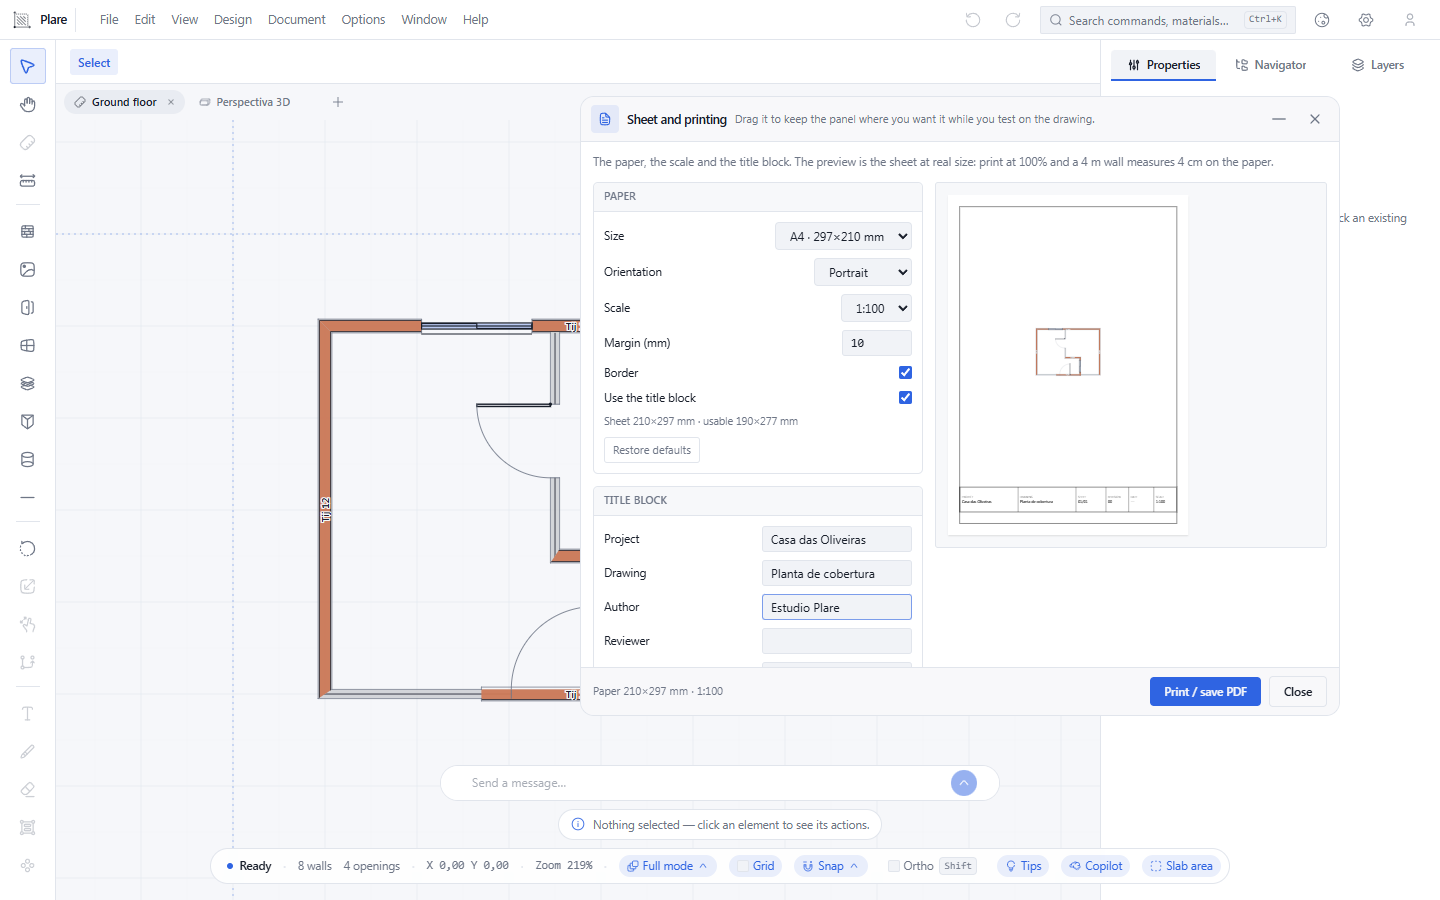
The fields written — Project Casa das Oliveiras, Drawing Planta de cobertura, Author Estudio Plare — and the block now standing at the foot of the previewed sheet. It is the wording that will come out on the paper, already laid out inside the border.
4. Changed the paper and want the defaults back? The panel has Restore defaults.
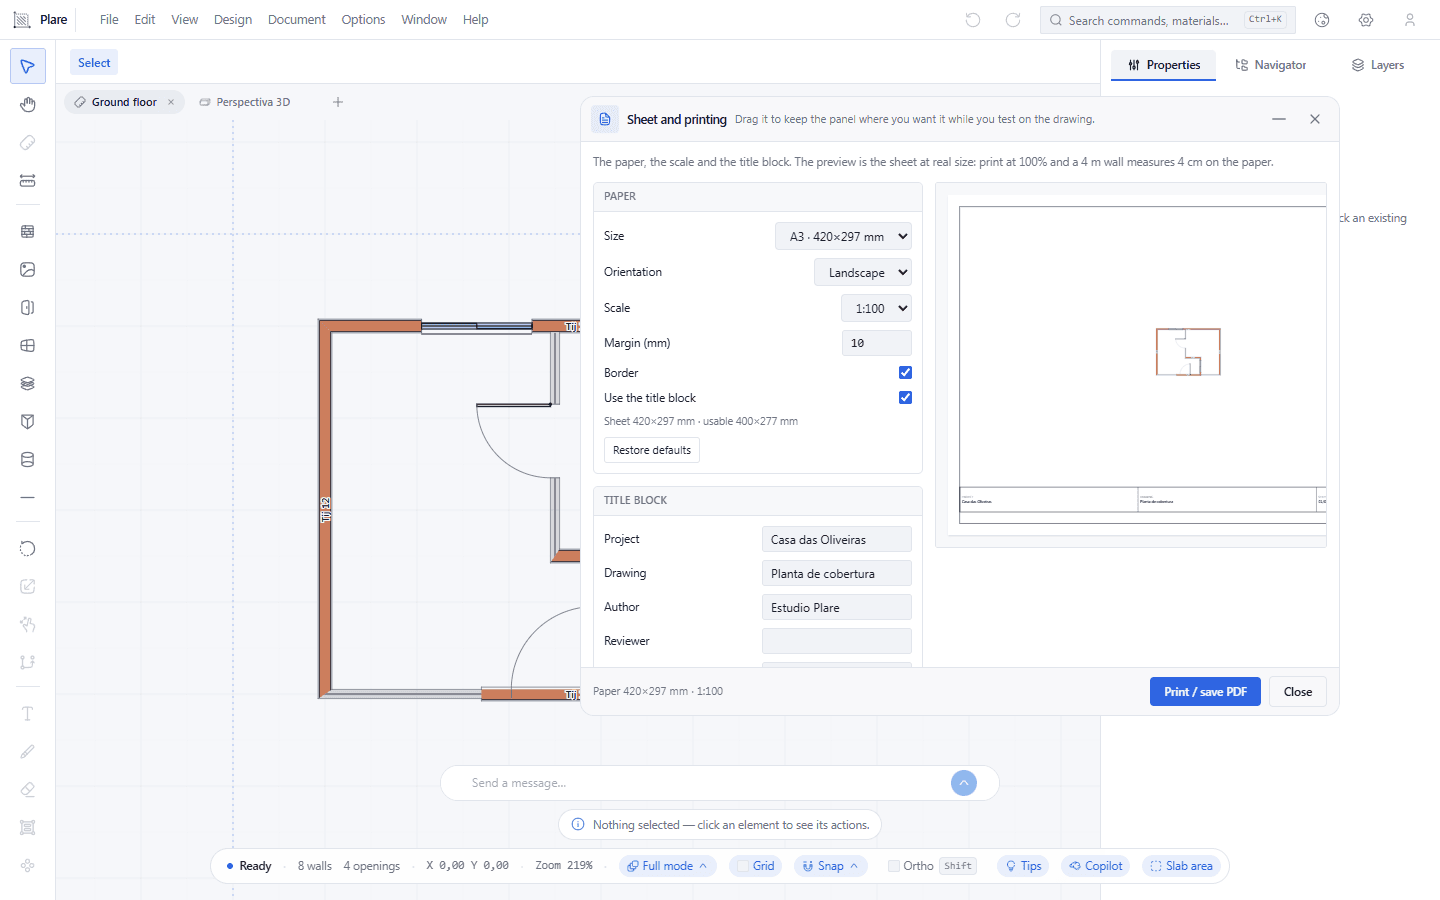
After clicking Restore defaults, the paper is back to A3 landscape and the title block's text has stayed where it was. The button resets the sheet — it does not delete what you typed.
Worth knowing
- Document → Print… opens this same panel; it does not print anything directly. The only button that prints is inside it.
- There is no keyboard shortcut for the sheet — Ctrl+K, or the menu, is the way.
- If the drawing does not fit the paper, the panel proposes the way out: reduce the scale or turn the sheet. Those are the two rescue buttons, and not an error.
- The defaults are A3, landscape, 1:100, a 10 mm margin, with border and title block on, revision 00 and sheet 01/01. Restore defaults goes back to them.
- The title block is a band at the bottom, with all the fields on a single line when they fit; turning it off leaves the sheet with only the border.
- The preview clears what is tool: neither the cursor, nor the selection, nor the guides appear on the sheet.
- An empty drawing shows the invitation to draw the plan, and not a blank sheet — if it appears empty with the drawing done, the problem is the scale or the framing.
Related tools
Related guides
The panel, in three blocks
Paper — what the sheet is. Title block — what the sheet says. Preview — what comes out. The first two are switches and lists; the third is not interactive, it is the proof.
Paper
| Field | Values | Note |
|---|---|---|
| Size | A1 (841×594), A2 (594×420), A3 (420×297), A4 (297×210) | Dimensions in millimetres, in landscape. |
| Orientation | Landscape, Portrait | Turns the rectangle, not the drawing. |
| Scale | 1:25 to 1:500 | From the drawing to the paper. |
| Margin (mm) | 5 to 30 mm | The free band between the border line and the edge of the paper. |
| Border | On/off | The outline rectangle of the sheet. |
| Title block | On/off | The identification band at the bottom. |
Four sizes, and they are the only ones. There is no custom size, because the sheet would be a number with no matching paper in the printer.
Title block
Eight text fields: Project, Drawing, Author, Reviewer, Date, Revision and the Sheet / Of pair, which are two separate boxes. The last ones are usually what someone forgets: the revision is the factory "00", and the sheet is "01/01" — which keeps saying "01/01" even when you print five sheets in a row. There is no automatic sheet numbering.
The preview
It draws the paper's rectangle at its real dimensions, reduced to fit inside the panel. Inside it, the plan is the SVG of the drawing you are looking at — copied, with the dimensions and the texts, and with none of the tools. The border and the title block are laid over it, with the positions and the sizes they will have on the paper.
Two consequences that avoid an argument:
- The view is never enlarged beyond 1:1. On an A1 it will look small because it is fitting, not because the drawing is small.
- What you see is geometry at scale, not screen thickness: a thin line in the drawing comes out thin on the sheet.
Going out to paper
One button, Print / save PDF, and it calls the system's printing with the sheet size already declared. That is why "save PDF" is not an option of ours: it is the "Microsoft Print to PDF", "Save as PDF" or whatever your printer offers inside the print window.
There is no export to image, no direct export to PDF without going through the print window, no splitting of the drawing into several sheets (mosaic) and no sheet per storey. They are four absences, and it is better to know them than to look for them.
A flow that works
Draw the closed plan, generate the automatic dimensions, fit the drawing, and only then open the sheet. The scale chosen there is the only one that counts: if you change the framing afterwards, the sheet follows — and the scale does not.
For plans with very different areas on the same storey, print two sheets with different scales and number them by hand in the title block. It is the honest way of doing it while there is no mosaic.