Settings windows
The windows that configure one object: wall, door, window, slab, style library, types, display and the sheet.
Step by step
1. Select the element and open its window from the window button in Properties.
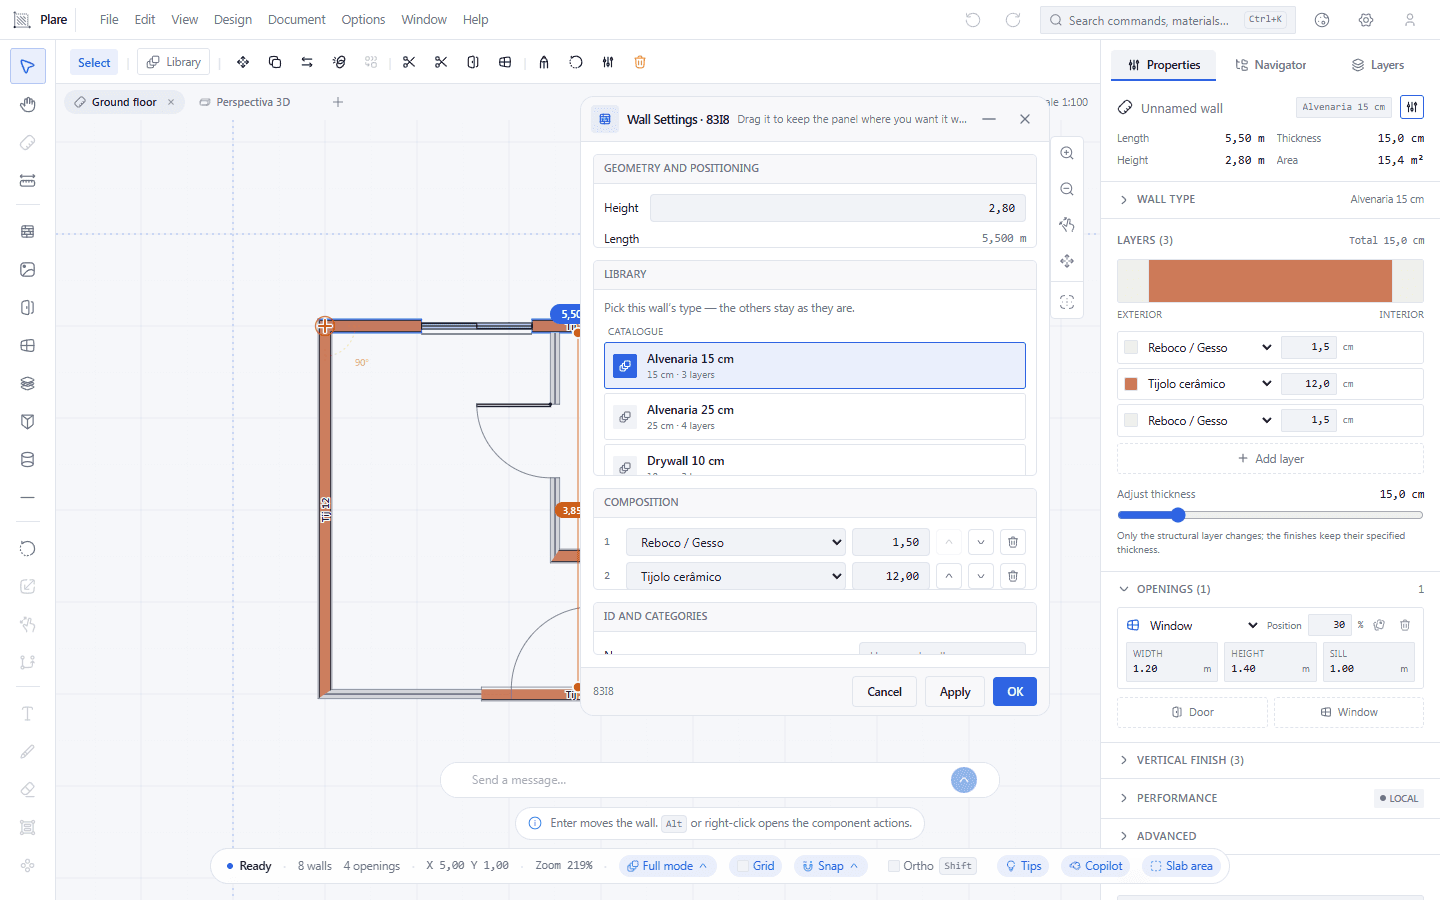
One wall's settings window, floating over the drawing area, with its geometry and placement, its layer library, its composition and its identification, and Cancel, Apply and OK in the footer. It is a work window: it stays open while you draw.
2. Minimise with the − to get it out of the way without closing it.
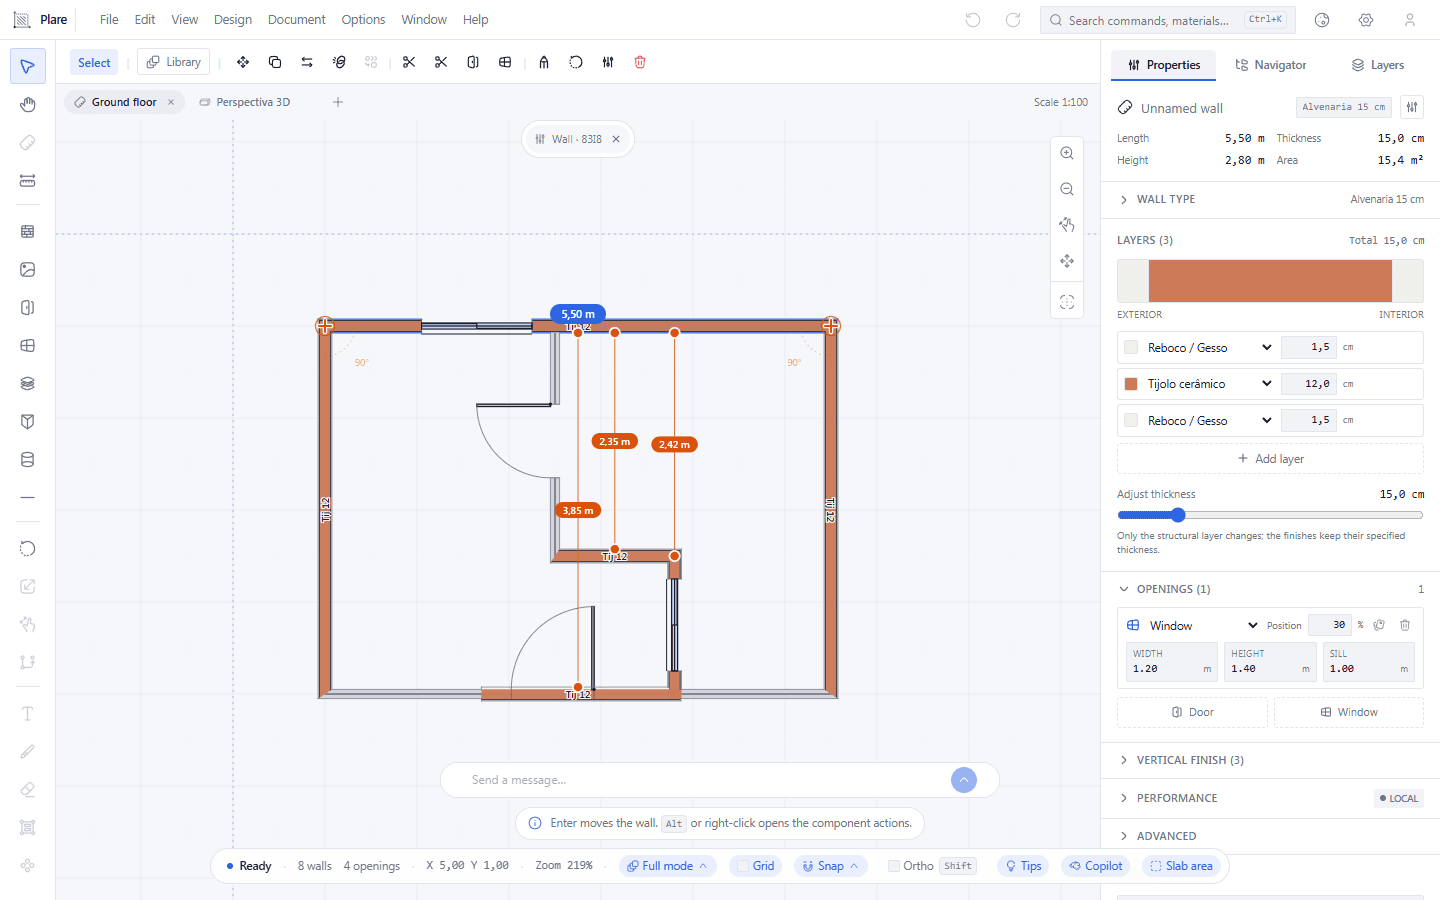
The window has become a small chip at the top of the drawing area, and the plan is visible again with its dimensions. This is how you compare an object against the drawing without losing what you have already typed in the window.
3. Open the style panel to see the catalogue and the display controls at once.
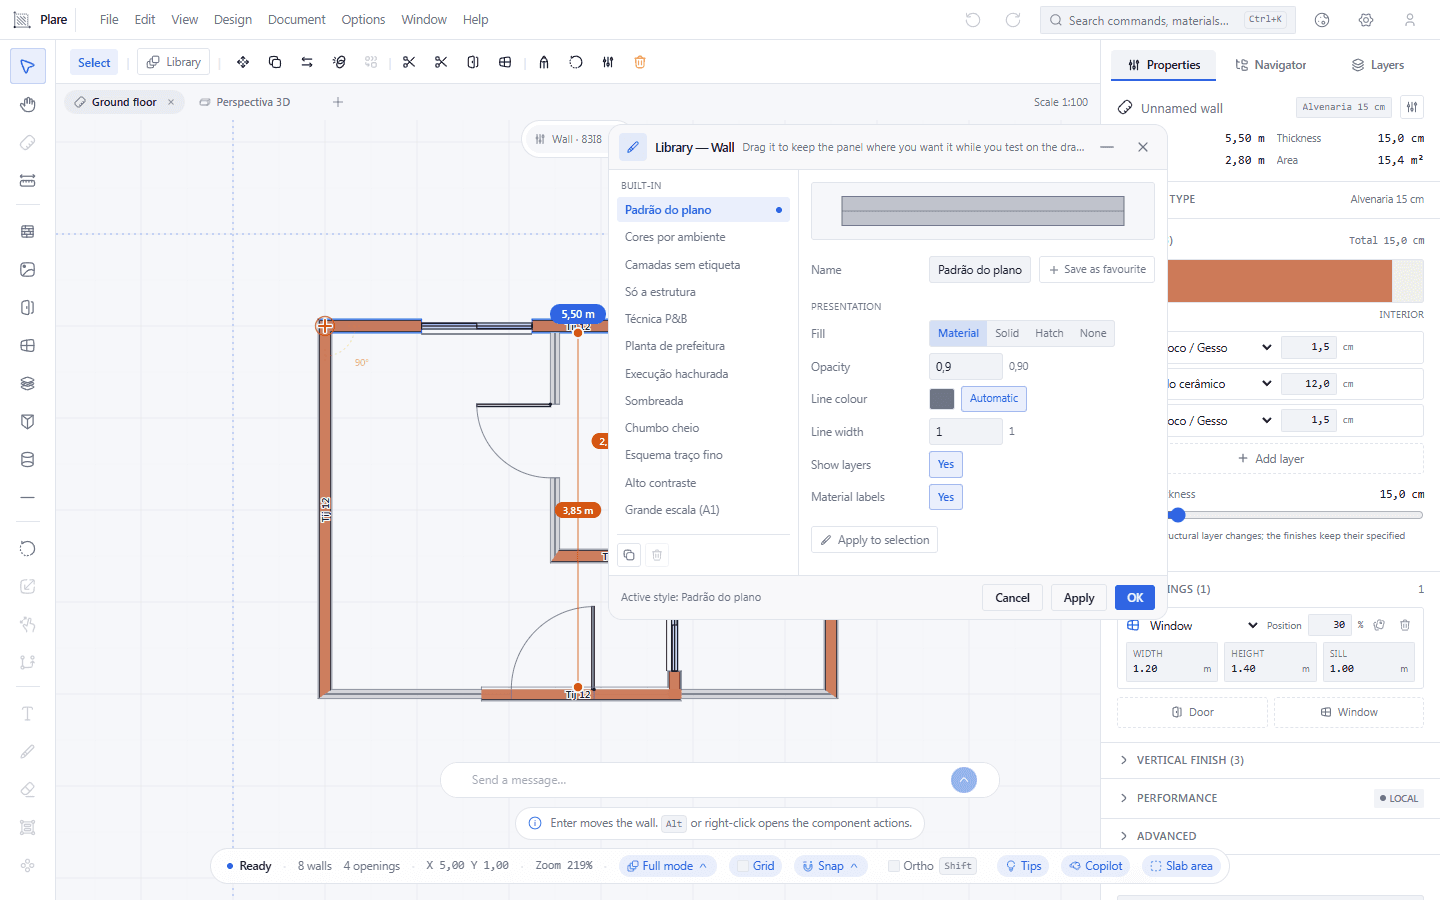
The wall style library: the list of types down the left, and on the right the presentation controls — fill and its opacity, line colour and line thickness, showing the layers and the material labels, with applying to the selection at the end. Choosing a style applies right away.
4. Keep two windows open at the same time — that is what they are for.
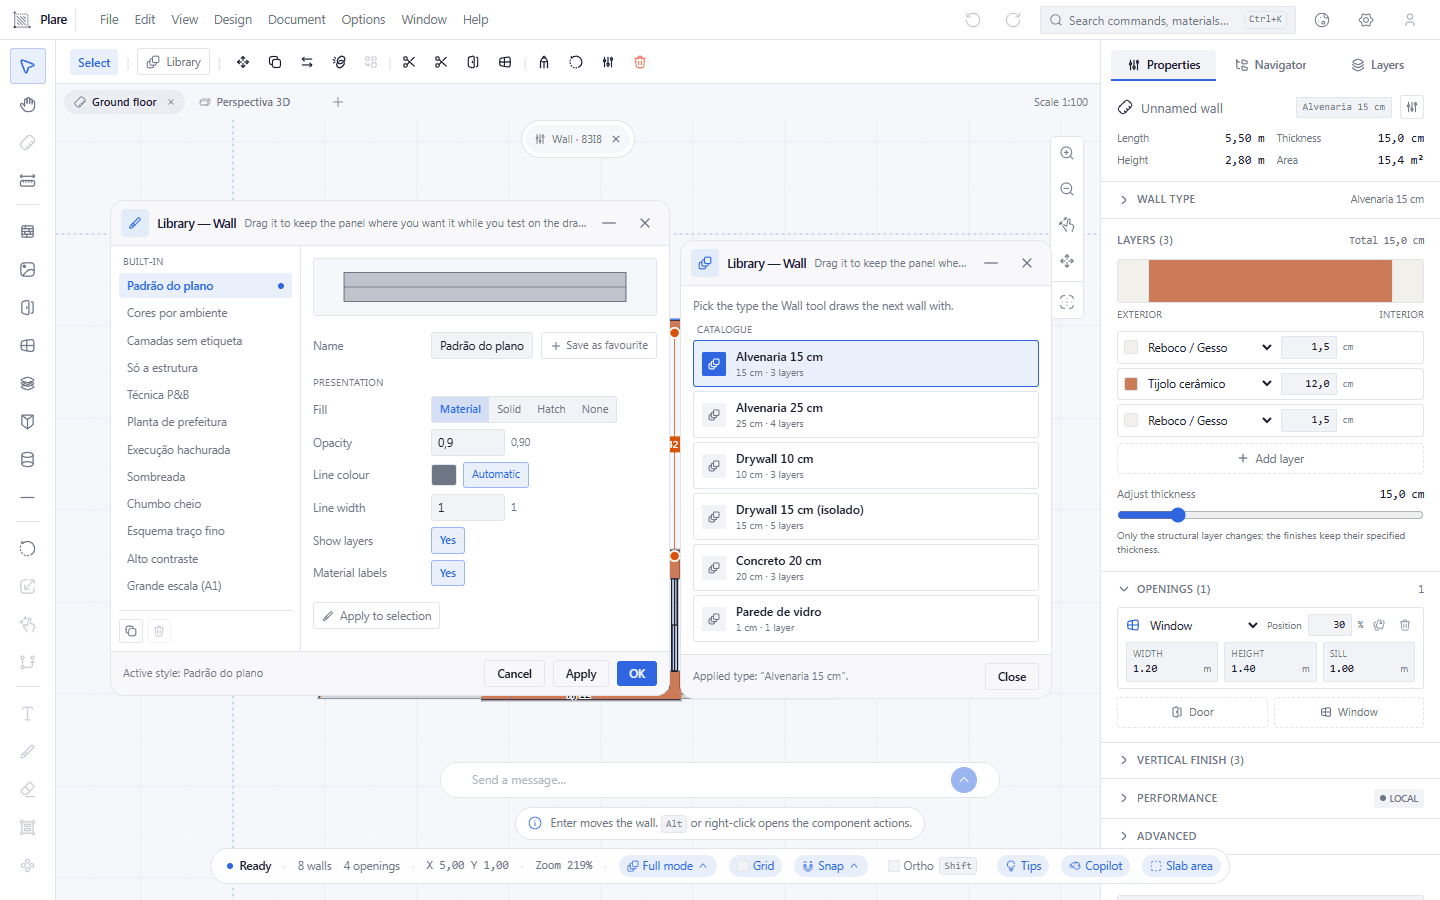
The style panel and the wall types library side by side, with the minimised wall still a chip at the top. Reopening does not duplicate, a click brings a window to the front, and Esc closes none of them — they are work tools, not confirmation dialogs.
Worth knowing
- There is only one window per object: reopening the wall window that is already open brings the same window back, in the same place, with what you had already typed.
- Clicking any point of a window brings it to the front of the others.
- Two open windows do not stack in the same spot: each one is born 28 px below and to the right of the previous one.
- The strip of minimised windows appears at the top of the drawing area as soon as there is at least one minimised window — it does not need two.
- There is no maximise, no resize and no closing everything at once. Drag it by the title bar; that is what exists.
- Each window has a single panel with section bars and switches — there are no tabs inside them.
- In the element windows, Cancel returns the object to the state it had before the window, and OK closes after applying.
- The style library applies right away — the drawing has already changed while you choose. The thickness draft needs Apply.
- The wall types window has no footer at all — only the × — because it too applies right away.
Related tools
Related guides
The eight windows
Wall. Geometry (length, panel height, computed volume), placement (axis, reference line, inner, outer or middle alignment), layer library, composition — the stack of layers with their order, the thickness of each one and the material by name — and identification (the structural type, the room function, the exposure condition and the phase).
It opens from the window button in the Properties of a selected wall, from the floating menu's card, by double-clicking the wall, and by the Door and Window tools when you have not chosen the wall yet — because an opening needs a wall, and this is the way to create one without leaving the gesture.
Door and Window. They are the same window with different labels: dimensions (width, height, the leaf's threshold height and the sill), position (offset from the start of the wall, and side), and identification (the marker, the piece number, the phase and the type family).
Slab. Outline (the area and the perimeter, with the edges showing the vertices that define it), thickness, top and bottom levels, the finish layer and the structural material, and identification. It opens from the window button in Properties, from the floating menu's card and by double-clicking.
Style library. The catalogue of appearances. It browses by Built-in, Mine and From this project; it creates, renames, duplicates, deletes and restores. Choosing a style applies right away — in the drawing and in the selected object, if there is one.
It opens from two places, and they are two different destinations: from a wall's window it writes into that wall; from a tool's options bar it sets the value the next object is born with. The windows therefore tell each other apart, and that is why both can be open at the same time.
Wall types. The catalogue of compositions: create, duplicate, rename, delete, restore the built-ins, and edit the composition of the selected type — with a preview of the section in section and in view. You pick it by where the window was opened from (the Design menu, or the type picker in the wall's window); the menu item is grey with "Coming soon", but the entry from the type picker works.
Display & print. Colour, stroke, thickness and visibility by category — walls, doors, windows, slabs, columns, beams, text, dimensions and images. Each row is a card with a preview, and choosing applies right away. A side column shows what changes in the drawing because of that choice.
It is the window of the drawing's aspect, not of its geometry: it is there so the plan comes out readable, and the Screen tab of Preferences is what decides the background.
Sheet. The paper — size, orientation, scale, margins and title block. It is the largest of these windows, and it has its own guide: see Sheet and title block.
What they all have
A title bar to drag, a − to minimise, a × to close. Content in a single panel, with groups separated by section bars and switches per field; what needs confirming has a footer, and the rest goes in right away.
Reopening does not duplicate, clicking brings to the front, and Esc does not close. These three rules are the reason you can have four windows open the whole afternoon: they are work tools, not confirmation dialogs.